


Anvisningar för demontering och montering av bromsbelägg för personbilar och transportbilar
Allmän information och säkerhetsinformation – var vänlig läs noggrant
Läs och följ alla instruktioner noggrant.
Om installationen utförs av en återförsäljare bör detta dokument överlämnas till fordonsägaren. Fordonsägaren bör spara detta dokument under produktens hela livslängd. Vid ägarbyte av det fordon som produkten har installerats i, ska detta dokument överlämnas till den nya ägaren.
Denna BREMBO-produkt har utformats och tillverkats för att uppfylla alla tillämpliga säkerhetsstandarder. Produkten är inte avsedd att användas på annat sätt än för det specifika ändamål som den har konstruerats och tillverkats för. Användning för något annat ändamål eller modifiering eller manipulering av produkten kan påverka produktens prestanda och kan göra produkten osäker. Sådan ändring eller felaktig användning upphäver den begränsade garantin för produkten, och kan leda till att den som använder produkten blir ansvarig för personskada eller egendomsskada på andra.
I dessa instruktioner betyder
"FARA!" förfaranden som, om de inte följs, med stor sannolikhet kan orsaka allvarliga personskador eller dödsfall.
"VARNING!" betyder åtgärder som, om de inte följs, kan leda till personskador.
"FÖRSIKTIGHET!" betyder åtgärder som, om de inte följs, kan leda till skador på fordonet, eller förorsaka oönskade symptom
Allmän varningar och anvisningar – var vänlig läs noggrant
FARA! Korrekt installation och användning av denna produkt är avgörande för säker drift av det fordon där den är installerad. Produkten är endast avsedd att installeras av en kvalificerad tekniker som har utbildats och/eller har erfarenhet av installation och användning av denna produkt, som har kunskap och erfarenhet av fordonsreparation och -underhåll och har tillgång till lämpliga verktyg. Som en allmän regel, följ instruktionerna i den ursprungliga litteraturen från fordonstillverkaren noggrant. Använd inte en slagskruvmejsel, observera åtdragningsmomenten, byt alltid självlåsande skruvar/muttrar/säkerhetselement.
Felaktig installation, oavsett om den orsakas av att dessa instruktioner inte har följts noggrant och fullständigt eller på annat sätt, upphäver den begränsade garantin och kan medföra att installatören blir ersättningsskyldig i händelse av personskada eller skada på egendom. BREMBO ansvarar inte för materialskador eller personskador som orsakas av en person som kör ett fordon på vilket en ersättningsprodukt har installerats på ett felaktigt sätt.
FARA! Bromsbeläggen måste bytas ut för varje bromsok på axeln.
FARA! All använd utrustning som blir utbytt mot produkten ska kasseras på rätt sätt och får inte återanvändas eller installeras på något annat fordon. Detta kan leda materiella skador och allvarliga personskador, inklusive dödsfall.
FARA! Se alltid till att bromsvätskenivån i behållaren på fordonet ligger mellan de minimi- och maximinivåer som anges på behållaren. En felaktig nivå av bromsvätska kan leda till att bromsarna inte fungerar som de ska och orsaka personskador, inklusive dödsfall och materiella skador. En felaktig nivå kan orsaka bromsvätskeläckage eller minskad effektivitet i bromssystemet.
FARA! Följ alltid tillverkarens anvisningar om korrekt hantering och användning av bromsvätska. Felaktig hantering av bromsvätska kan leda till allvarliga personskador eller materiella skador.
FARA! Innan du påbörjar installationen av den här produkten ska du se till att den och alla andra delar och material som används är lämpliga för fordonets fabrikat och modell
FARA! Kontrollera alltid att alla elektriska kontakter är rätt anslutna efter installationen. Innan du använder fordonet ska du se till att fordonets bromsvarningslampor tänds när bromsarna används. Om fordonets bromsljus inte tänds, får fordonet inte användas
FARA! Låt inte friktionsmaterialet i bromsbeläggen, skivorna, bromsoken eller bromsledningarna komma i kontakt med fett, olja eller andra mineraloljebaserade smörjmedel eller avfettningsmedel, eftersom detta kan påverka bromssystemet och orsaka personskador eller materiella skador. Byt ut dessa delar vid förorening.
VARNING! Under installationen av denna produkt och installation eller byte av relaterade artiklar som bromsvätska, bromsbelägg, bromsbackar och liknande, kan installatören använda eller utsättas för vätskor och andra material som kan anses farliga enligt gällande lagar och förordningar, eller på annat sätt omfattas av lagar och förordningar som reglerar användning och avfallshantering. Allt sådant material måste hanteras, återvinnas och skaffas bort i enlighet med alla tillämpliga lagar och förordningar. Underlåtenhet att göra detta kan leda till personskador, materiella skador och civilrättsliga eller straffrättsliga påföljder.
VARNING! Hantera produkten med försiktighet under installationsprocessen. Undvik att slå hårt eller på annat sätt hantera produkten eller dess delar och komponenter vårdslöst, eftersom skador på produkten kan leda till att den inte fungerar som den ska. Byt vid behov ut skadade delar eller komponenter.
VARNING! För att undvika personskador eller materiella skador vid installation produkten:
- Använd alltid andningsmask lämplig utrustning för att förhindra inandning av damm som uppstår vid rengöring av delarna eller komponenterna.
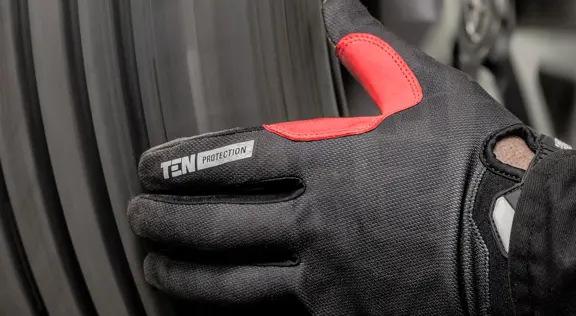
- Använd alltid handskar vid demontering och montering av komponenter med vassa kanter.
- Låt inte hud komma i direkt kontakt mellan belägget och bromsbackarnas beläggning eftersom detta kan orsaka skavsår.
- Undvik direktkontakt med bromsvätskan eftersom den kan orsaka irritation på hud och ögon. Vid kontakt, rengör noggrant i enlighet med anvisningarna från tillverkaren av fordonet eller bromsvätskan.
- Utsätt inte de elektriska komponenterna för elektrostatiska laddningar eller stötar som kan skada plastdelarna.
- Skydda de demonterade elektriska komponenterna mot fukt.
VARNING! Avfallshantera utbytta delar i enlighet med gällande lagar och förordningar.
VARNING! Dessa monteringsanvisningar är en allmän vägledning som kan variera från ett bromssystem till ett annat. Följ även anvisningarna från tillverkaren av fordonet och/eller bromsoket.
VARNING! Om en skada eller defekt skulle observeras på någon del av bromssystemet under installationen, måste de berörda delarna bytas ut innan fordonet tas i bruk igen.
FARA! Innan du börjar arbeta på bromssystemet ska du fästa ett varningsmeddelande på styret/ratten om att fordonet är under reparation, spärra de hjul som inte servas, stötta upp fordonet och säkerställa dess stabilitet.
FÖRSIKTIGHET! Använd inte mekanisk kraft under demonteringen.
FÖRSIKTIGHET! Illustrationerna är avsedda som vägledning.
Demonteringsvarningar och anvisningar
FÖRSIKTIGHET! Provkör fordonet för att bekräfta symptomen. Inspektera noggrant alla anslutna/kringliggande komponenter. Möjlighet att diagnosticera fel som inte har med bromsarna att göra. Anslutna/kringliggande komponenter som inte är i gott driftsskick kan skapa problem med NVH. En okulärbesiktning kan ge en indikation om ett yttre problem
FÖRSIKTIGHET! Slutför installationen på ena sidan av axeln innan du påbörjar installationen på axelns andra sida. Dessa utbytes- och installationssteg måste vara identiska för båda bromsarna på samma axel. Montera en broms i taget. För att kontrollera om installationen är korrekt, kan du använda bromsen på axelns andra sida, som ännu inte är demonterad, som en visuell jämförelse för korrekt placering av de olika delarna under återmonteringen.
VARNING! Under alla åtgärder som beskrivs får inloppsslangen för bromsokets vätska INTE kopplas bort.
FÖRSIKTIGHET! Trampa aldrig på bromspedalen eller parkeringsbromsen när du arbetar med bromssystemet, eftersom det kan skada systemet.
FARA! Haka fast bromsoket på fordonets chassi med hjälp av lämpliga stöd för att förhindra skador på den flexibla slangen.
FARA! Undvik att klämma till slangen eller skapa böjar, slingor, sträckningar eller andra distorsioner av försörjningsröret för bromsvätska.
VARNING! Bromsbeläggen måste alltid bytas ut på hela fordonsaxeln.
FÖRSIKTIGHET! Notera placeringen av alla komponenter som demonterats eller delvis demonterats för att säkerställa korrekt återmontering.
Rengör alla komponenter som ska monteras eller återmonteras noggrant (nya eller tidigare demonterade) och kontaktytorna mellan de olika komponenterna med lämpliga produkter som inte lämnar rester, eller som kan skada stommen. (t. ex. en fuktig trasa).
FARA! Se till att alla komponenter som ska monteras eller återmonteras är i felfritt skick. Om de är skadade, ska de bytas ut mot nya komponenter.
VARNING! Kontrollera bromsoket, alla andra rörliga delar och glid-/styrelement för att se till att de inte är slitna och fungerar som de ska.
VARNING! Kontrollera att alla styrnings- och hjulfjädringselement samt hjullagren inte har något spel eller slitage.
VARNING! Öppna locket till bromsvätskebehållaren och kontrollera vätskenivån. Indragningen av kolvarna, som beskrivs nedan, leder till en ökning av bromsvätskenivån i behållaren. Kontrollera att nivån på bromsvätskan inte förorsakar läckage, eftersom detta kan skada fordonets lackerade delar.
Alla stänk eller vätskeläckage ska omedelbart torkas bort med papper och sedan rengöras med vatten.
VARNING! Demontera inte någon typ av tillbehör som sitter fast på kolven
Att byta ut bromsbeläggen utan att demontera bromsoket från fordonet
![Fast bromsok, typ [A] (demontering av sidobelägg).](/sv/media/supportarticle/images/1000-1000-fix/1b22c384-81fd-4212-9095-8580d36a6582)
Fig 1. Fast bromsok, typ [A] (demontering av sidobelägg).
![Flytande bromsok, typ [B] (demontering av undre belägg).](/sv/media/supportarticle/images/1000-1000-fix/3b021890-da22-4a69-9242-537eb6d5b9ad)
Fig 2. Flytande bromsok, typ [B] (demontering av undre belägg).
1. Demontera dammskyddet, i förekommande fall.
2. Koppla bort slitageindikatorns kontakt, om sådan finns. Demontera de säkerhetstillbehör som används för att fästa bromsbeläggen, t.ex. låsklämmor, hållarstift, fjädrar eller skruvar.
FÖRSIKTIGHET! Fjädrarna som håller fast bromsbeläggen är under spänning. De måste lossas på ett kontrollerat sätt och, om möjligt, hållas på plats med hjälp av bromsokets stomme. Byt ut dessa fjädrar vid varje bromsbeläggsutbyte, för att förhindra problem med NVH-fenomen.
3. På vissa modeller är fjädern fäst på bromsbeläggen och demonteras och byts tillsammans med dem.
VARNING! Se till att kolvarna inte skadas under indragningen genom att använda korrekta verktyg för indragning.
4. För fasta bromsok typ [A]
- Använd vid behov en indragare för att dra in bromsbeläggen.
Dra ut bromsbeläggen från bromsokets stomme.
5. För flytande bromsok typ [B]
- Tryck bromsokets stomme mot stödet och tryck det mot skivan med fingrarna.
Ta först isär bromsbelägget på kolvsidan och tryck sedan bromsokets stomme mot skivan tills det andra belägget kan tas bort från bromsokets stomme.
6. För bromsok typ [A] och [B]
- Kontrollera, i förekommande fall, skicket på plattorna och byt ut dem om de är skadade
7. Ta bort och kontrollera eventuella mellanlägg och byt ut dem mot nya om de är slitna eller skadade.
VARNING! Demontera inte några plattor eller lock som kan vara fast förbundna med bromskolven.
FARA! Om det finns tecken på vätskekontaminering eller andra skador på bromsoket, byt ut det mot ett nytt.
Att byta ut bromsbeläggen med bromsoket delvis demonterat
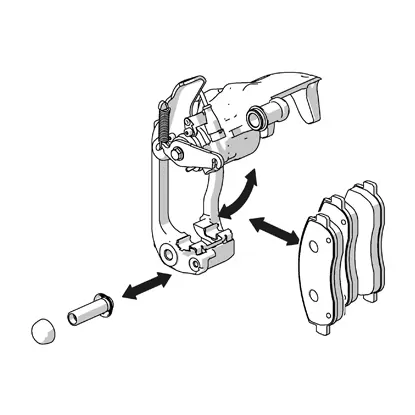
Fig 3. Fast bromsok
"Sluten stomme" fast bromsok typ [C] (demontering av övre belägg), [D] och [E] (demontering av sidobelägg).
1. Lossa slitageindikatorns kontakt i förekommande fall.
2. Demontera eller skruva av fästskruvarna/styrningarna osv., beroende på bromsokets konfiguration.
FARA! Undvik att klämma till slangen eller skapa böjar, slingor, sträckningar eller andra distorsioner av försörjningsröret för bromsvätska.
VARNING! Använd korrekt verktyg för indragning av bromsbeläggen.
3. Demontera de säkerhetstillbehör som används för att fästa bromsbeläggen, t.ex. låsklämmor, hållarstift, fjädrar eller skruvar.
För fasta bromsok typ C, D och E - Dra ut bromsbeläggen från bromsokets stomme. Byt ut dessa tillbehör vid varje bromsbeläggsutbyte, för att förhindra problem med NVH-fenomen.
Nästa steg ( förberedelse för installation)
1. Avlägsna alla spår av korrosion på bromsskivytans yttre och inre delar.
VARNING! Om bromsskivytan uppvisar sprickor eller djupa spår, ska den bytas ut.
VARNING! Om bromsskivytan uppvisar sprickor eller djupa spår, ska den bytas ut.
Dra in kolvarna helt. Dra in alla kolvar samtidigt med ett korrekt verktyg på bromsok med 2 eller 4 kolvar.
För bromsar som kombinerar mekanisk parkeringsbroms och justeringsfunktion måste kolvarna återföras till sin ursprungliga position genom att vrida dem manuellt eller med hjälp av justerskruvar, beroende på typen.
2. Rengör bromsbeläggets viloområde med lämpligt material och produkter (t.ex. en fuktig trasa) före installationen
3. Rengör fäste, bromsokets stomme och glidpinnar med rengöringsmedel som inte är mineraloljebaserat
4. Byt ut spruckna eller skadade dammskydd.
VARNING! Byt ut korroderade styrtappar.
FARA! För flytande bromsok – smörj vid behov bromsokets glidskenor med det medföljande fettet och följ anvisningarna från fordonets eller bromsokets tillverkare.
FARA! Se till att friktionsytorna inte blir feta. Byt annars ut alla förorenade komponenter mot nya produkter.ù
VARNING! Använd inte produkter som kan skada gummidelar, som t.ex. nitro-thinner, bensin osv.
VARNING! Rengör inte komponenterna i bromssystemet med tryckluft, hårda borstar eller liknande.
VARNING! Rengör inte komponenterna i bromssystemet med tryckluft, hårda borstar eller liknande.
VARNING! Ta inte bort fett från styrningar och fjädrar som kräver särskild smörjning för korrekt funktion.
Installation (montering)
VARNING! När bromsbeläggen har monterats måste de kunna röra sig fritt i sitt säte.
1. Sätt i de nya bromsbeläggen enligt anvisningarna ovan i ”Demontering” i omvänd ordningsföljd.
FARA! Beläggen måste sättas in med friktionsmaterialet vänt mot skivan.
VARNING! Vid riktbara bromsbelägg indikerar pilen fordonets framåtrotation.
VARNING! Vid riktbart bromsbelägg utan markeringar: byt ut dem i samma position som originalen.
VARNING! Om satsen innehåller en påse med fett ska fettet endast smörjas på sidan av metalldelen på bromsbeläggen och/eller på baksidan av bromsbeläggen, enligt fordonstillverkarens anvisningar.
FÖRSIKTIGHET! Kontrollera att eventuella fjädrar i beläggens säten är korrekt placerade.
FÖRSIKTIGHET! Återanslut slitageindikatorn i förekommande fall.
2. Om fjädern inte sitter fast i beläggen, placera om den.
FÖRSIKTIGHET! Fjädern är korrekt placerad när stiftet eller stiften kan föras in och när eventuella ingraverade pilar pekar i skivans rotationsriktning.
3. Sätt tillbaka stiftet eller stiften och håll fjädern i sitt läge och dra dem mot bromsokets stommes motsatta sida. Ett stift är korrekt infört när det inte kan skjutas längre fram.
För bromsok med skruvstift, dra åt stiftet med det stängningsmoment som föreskrivs av fordonets och/eller bromsokets tillverkare.
Sätt tillbaka säkerhetstillbehören, i förekommande fall: fästklämmor, fjädrar eller skruvar.
FARA! Se till att bromsbeläggen sitter fast ordentligt.
4. Sätt eventuellt tillbaka dammskyddet med ett lätt tryck.
5. Återanslut slitageindikatorn i förekommande fall.
6. Sätt tillbaka bromsoket och dra åt fästskruvarna med det stängningsmoment som föreskrivs av fordonstillverkaren.
FARA! Undvik att klämma till slangen eller skapa böjar, slingor, sträckningar eller andra distorsioner av försörjningsröret för bromsvätska.
7. För ett bromsok med radiell montering (skruvanslutning vinkelrätt mot hjulaxeln), återmontera bromsoket och dra åt fästskruvarna för hand, utan att använda verktyg. Applicera bromsen några gånger och dra åt fästskruvarna med det stängningsmoment som föreskrivs av fordonstillverkaren.
FÖRSIKTIGHET! För bromsok med parkeringsbroms eller med system för automatisk återställning av spel – applicera bromsen några gånger för att återställa det vanliga spelet (retur). Följ anvisningarna från tillverkaren av fordonet eller bromsoket.
8. Följ samma procedur på det andra bromsoket på samma axel, i förekommande fall.
9. Om det är demonterat, återmontera hjulet enligt fordonstillverkarens instruktioner.
Funktionskontroller
1. Kontrollera bromsvätskenivån i behållaren och fyll på ny vätska om det behövs, upp till max.-markeringen på behållaren enlig fordonstillverkarens anvisningar.
2. Rengör behållarens lock och membran försiktigt, i förekommande fall.
3. Montera membranet och stäng locket enligt fordonstillverkarens anvisningar.
4. Rengör noggrant med en fuktig trasa om bromsvätska har spillts ut. Undvik direktkontakt med bromsvätskan eftersom den kan orsaka irritation på hud och ögon. Vid kontakt, rengör noggrant i enlighet med anvisningarna från tillverkaren av fordonet eller bromsvätskan.
5. För att uppnå full bromseffekt, använd bromsspaken/pedalen för att möjliggöra korrekt position för bromsbeläggen. Upprepa denna åtgärd tills spaken/pedalens slaglängd har stabiliserats vid ca 1/3 av det totala slaget. När en konstant kraft appliceras, ska spaken/pedalens slaglängd inte ändras ens efter en lång period.
FARA! Om trycket eller tryckstabiliteten inte uppnås, kontrollera hela bromssystemet igen. Under dessa förhållanden kan bromsen inte användas.
- Kontrollera bromssystemet igen med avseende på läckage.
- Kontrollera bromsvätskenivån i behållaren igen och fyll på vid behov enligt fordonstillverkarens anvisningar. Använd endast ny bromsvätska av den kvalitet som anges för den aktuella fordonstypen.
6. Utför bromsprov vid låg hastighet.
Testa och köra in
FARA! Vid första användningen av de nya bromsbeläggen ska du komma ihåg att bromsförmågan minskar och därför är det nödvändigt att:
- anpassa din hastighet.
- undvika plötsliga inbromsningar.
- alltid följa alla tillämpliga trafikregler och förordningar.
Provkör fordonet på väg, var noga med att inte trampa på bromsen eller hålla pedalen nedtryckt i mer än 3 sekunder; se till att det inte kommer något ljud eller vibrationer från bromsarna.
FARA! Följ alltid fordonstillverkarens anvisningar för körning i trafik. Om det saknas anvisningar från fordonstillverkaren, rekommenderar vi att fordonet används under minst 200 km/125 miles och att bromsarna används försiktigt och sparsamt under den perioden, så att du undviker plötslig bromsning i mer än 3 sekunder och utan att fordonets låsningsfria bromssystem aktiveras. Utför ett funktionstest på rullar för att säkerställa att systemet uppfyller alla lagstadgade krav
VARNING! Om nya bromsar inte är ordentligt inkörda kan det leda till att bromssystemet inte fungera effektivt.
Underhåll
FARA! Bromsbelägg slits och måste därför kontrolleras med jämna mellanrum.
Om tjockleken på det friktionsmaterial som finns kvar på en belägget är mindre än 2 mm eller om slitageindikatorn tänds ska alla belägg på en axel bytas ut.
Begagnade bromsbelägg måste kasseras enligt gällande lagstiftning och nationella och/eller lokala bestämmelser.
Garanti
Vi garanterar att produkten uppfyller tillverkarens specifikationer och att den är fri från material- och tillverkningsfel. Garantin har en begränsad giltighetstid på två år från inköpsdatumet eller en längre period som fastställs i lag. Garantin har en begränsad giltighetstid på två år från inköpsdatumet eller en längre period som fastställs i lag. Om ett fel upptäcks måste det anmälas inom 60 dagar från upptäckten och inom två år från inköpsdatumet. Om felet bekräftas och omfattas av garantin kommer produkten att repareras eller ersättas med en ny eller grundligt renoverad produkt. Garantin täcker inte skador som helt eller delvis orsakats av felaktig användning, brand, kemisk korrosion, olaglig användning eller för andra ändamål än de avsedda, användning på en annan modell än den avsedda, felaktig installation eller i strid med vad som anges av tillverkaren eller underlåtenhet att underhålla produkten enligt tillverkarens anvisningar i de medföljande instruktionerna.
Är det något annat du vill fråga oss?
Kontakta Brembo tekniksupport. Våra tekniker kommer att kontakta dig så snart som möjligt!