Instructions for replacing the brake disc
Please read and follow all instructions carefully. You’ll find the same instructions in the brake disc pack. Remember to keep them for the entire product life cycle. Hand them over to the new owner if you sell your vehicle.
The instructions are just general guidelines, as brake discs may differ from those illustrated below.
The instructions are just general guidelines, as brake discs may differ from those illustrated below.
Replacement procedure
The procedure described is for one wheel, and must be repeated on the other wheel of the axle.
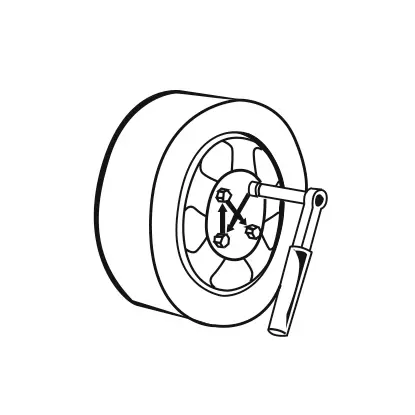
1. Remove the wheel
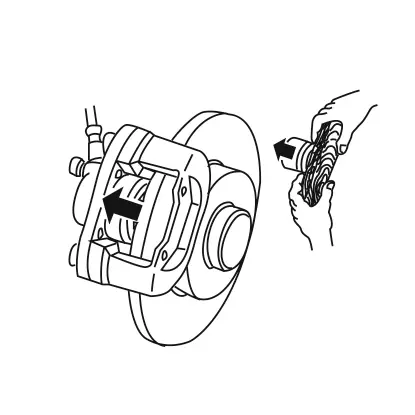
2. Remove the pads and pull back the piston(s). Use the dedicated tool!
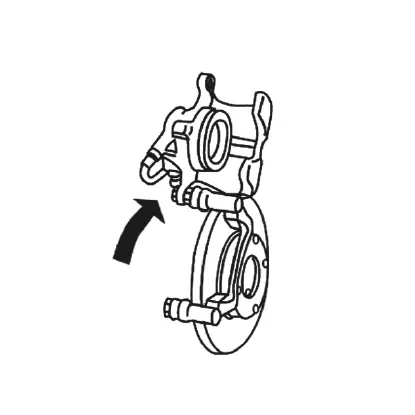
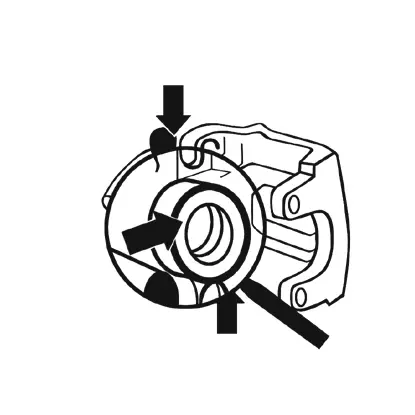
3. Remove the caliper from its mount.
DANGER! Do not disconnect the brake fluid supply line from the caliper. Suspend the caliper, making sure the supply line is not pulled taut.
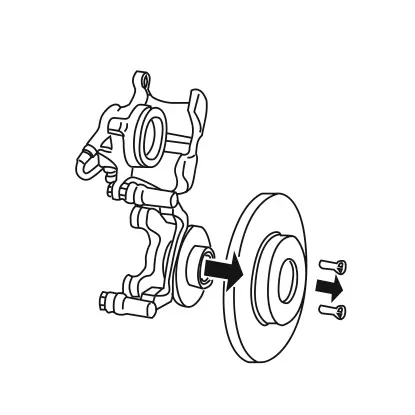
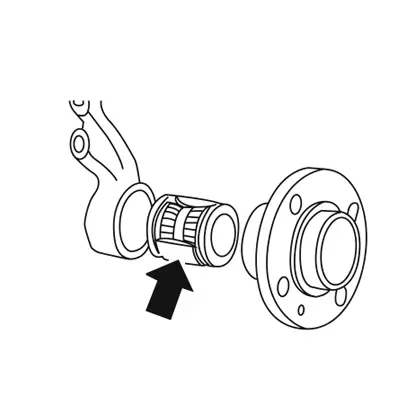
4. If necessary, disassemble the wheel hub before removing the disc. Then disassemble the brake disc.
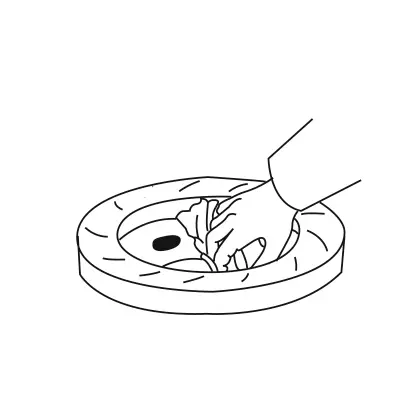
5. Clean the mounting face on the new disc.
WARNING! Do not soil the mounting face with oil or grease.
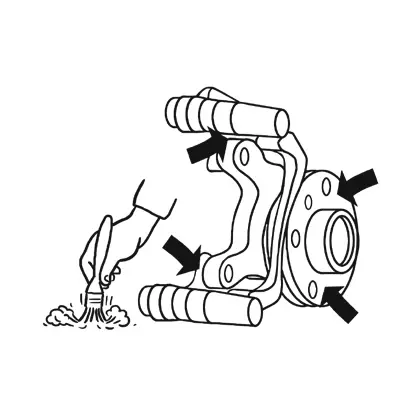
6. Thoroughly clean the disc mounting face on the wheel hub, removing any deposits and rust; check that the surface is not damaged or deformed, and restore it to the proper condition if necessary.
7. Check for smooth rotation and correct end float of the wheel bearings.

8. If the wheel hub has not been removed: fit the new disc to the wheel hub and secure with the fastening screw; adjust the bearing where required, following the vehicle manufacturer’s instructions.
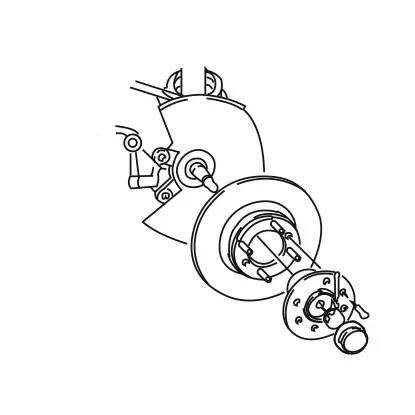
9. If the wheel hub was removed in step 4 (fig. D): assemble the hub and disc, tightening the fastening screws at the specified torque. Fit the hub-disc assembly onto the wheel axle, adjust the bearing and complete fitting operations according to the vehicle manufacturer’s instructions.
Read the article about the correct tightening torque.

10. Check lateral runout of the disc using the metrology kit; the dial gauge must be positioned as illustrated, 5mm from the outer diameter. Secure the disc with a number of wheel nuts to simulate the condition in which the wheel is mounted. The maximum value of runout per full revolution of the disc is: 0.10 mm for cars - 0.12 mm for commercial vehicles. If necessary, remove the disc and refit it to the wheel hub in a different position, then repeat the measurement.
WARNING! Conduct this test with care. A runout value higher than indicated will lead to abnormal wear and generate vibration when braking.

11. If the runout measurement is unacceptable, measure the runout of the wheel hub mounting face; if necessary, replace the hub and refit the disc.
WARNING! The permissible runout value for the wheel hub mounting face is approximately half that specified for the disc.
12. Refit the caliper to its mount; in the case of a floating caliper, check for smooth sliding action of the body on the guides.
CAUTION! Check that rubber parts are not damaged. Replace if necessary.

13. Fit the new pads, with the related springs and pins. Grease the back and edges of the pads where indicated.
Connect the wear indicator, if installed.
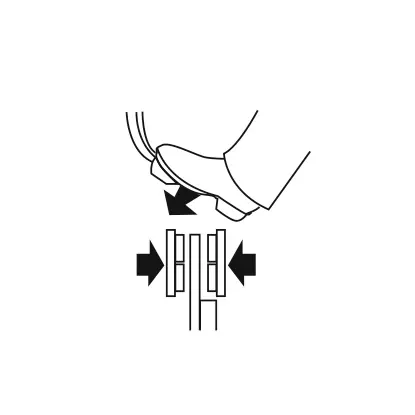
14. Operate the pedal to bring the pads closer to the disc. Repeat this process until the pedal travel is as it should be.
15. Check the level of brake fluid in the reservoir, topping up if necessary.
16. Refit the wheel and tighten the wheel nuts as indicated by the vehicle manufacturer or as in the Brembo catalogue.
17. Balance the wheel.
Testing and running in
Road test the vehicle, taking care not to stab at the brakes or keep the pedal depressed for more than 3 seconds; make sure there is no noise or vibration from the brakes.
The user of the vehicle should run in the new discs and pads for at least 200 km, applying the brakes gently and sparingly, and without activating the ABS.
CAUTION! If new brakes are not properly run in, the braking system could be prevented from operating efficiently
General and safety information
This Brembo product has been designed to comply with all applicable safety standards. Products are not intended to be used differently from the specific use for which they have been designed and manufactured. Use for any other purpose, or any modification to or tampering with the Product can affect the performance of the Product and may render the Product unsafe.
Such modification or improper use will void the Limited Warranty, and may subject the individual so using the Product to liability for bodily injury or property damage to others.
In these instructions, the “DANGER!” warning means procedures which, if not observed, have a high degree of probability that they will cause serious injury or even death. “CAUTION” means procedures which, if not observed, could result in physical damage whereas “WARNING!” means procedures which, if not observed, could possibly cause damage to the vehicle.
DANGER!
Before commencing replacement, ascertain that the spare parts are suitable for the make and model of the vehicle. This Product is vital to the safe operation of the vehicle on which it is installed, and it is intended to be installed only by a skilled, qualified individual who has been trained and/or is experienced in the installation and use for which the Product is intended.
The installer must be equipped with the proper tools of his trade, and with the knowledge and experience to deal with vehicle repairs. Improper or incorrect installation, whether caused by a failure to follow these Instructions faithfully and completely or otherwise, will void the Limited Warranty and could subject the installer to liability in the event of personal injury or property damage.
It is essential that you replace the brake discs for each axle, taking them from the same box. Every time you replace the discs also replace the related pads.
Avoid contact of grease and other lubricants with the braking surfaces of the disc and pads as this could affect the efficiency of the braking system.
Brembo shall not be liable for any damage or injury caused to or by any person operating a vehicle on which a replacement product has been improperly installed.
CAUTION!
Replaced parts must be disposed of in accordance with the law.
It is vital to avoid sharply striking and/or damaging the Product, its parts and its components, as this can impair their efficiency and may cause them to malfunction. If necessary, replace any damaged part or component.
To avoid injury we recommend the following:
- Always wear gloves during disassembly and assembly of components with sharp edges.
- Do not allow skin surface to make direct contact with the friction material of pads and brake shoes since this could cause abrasions.
Warranty limitations
This warranty covers all the conformity defects occurring within two years from delivery of the good. The consumer is required to report to the seller the conformity defect within two months from the date of discovery of the said defect, without prejudice to the fact that the limitations period for taking action aimed at seeking redress for the defect is twenty-six months from delivery of the good. In the event of a conformity defect, the user has the right to repair or replacement of the good, or to an appropriate price reduction or termination of the contract, as established by art. 130 of the Consumer Code, where applicable.This warranty constitutes the only warranty provided in relation to this product and replaces any other warranties, both verbal and written.
Θέλετε να ρωτήσετε κάτι άλλο;
Επικοινωνήστε με το τμήμα τεχνικής υποστήριξης της Brembo. Οι τεχνικοί μας θα επικοινωνήσουν μαζί σας το συντομότερο δυνατό!